HOW IT'S MADE
Insights into Prototyping
Stories
by Eddie
DIVING IN TO IT
Every great sideboard starts with a sketch — and mine looked exactly like the kind you'd pin to the fridge out of moral support rather than technical merit. But behind the rough lines was a clear vision.
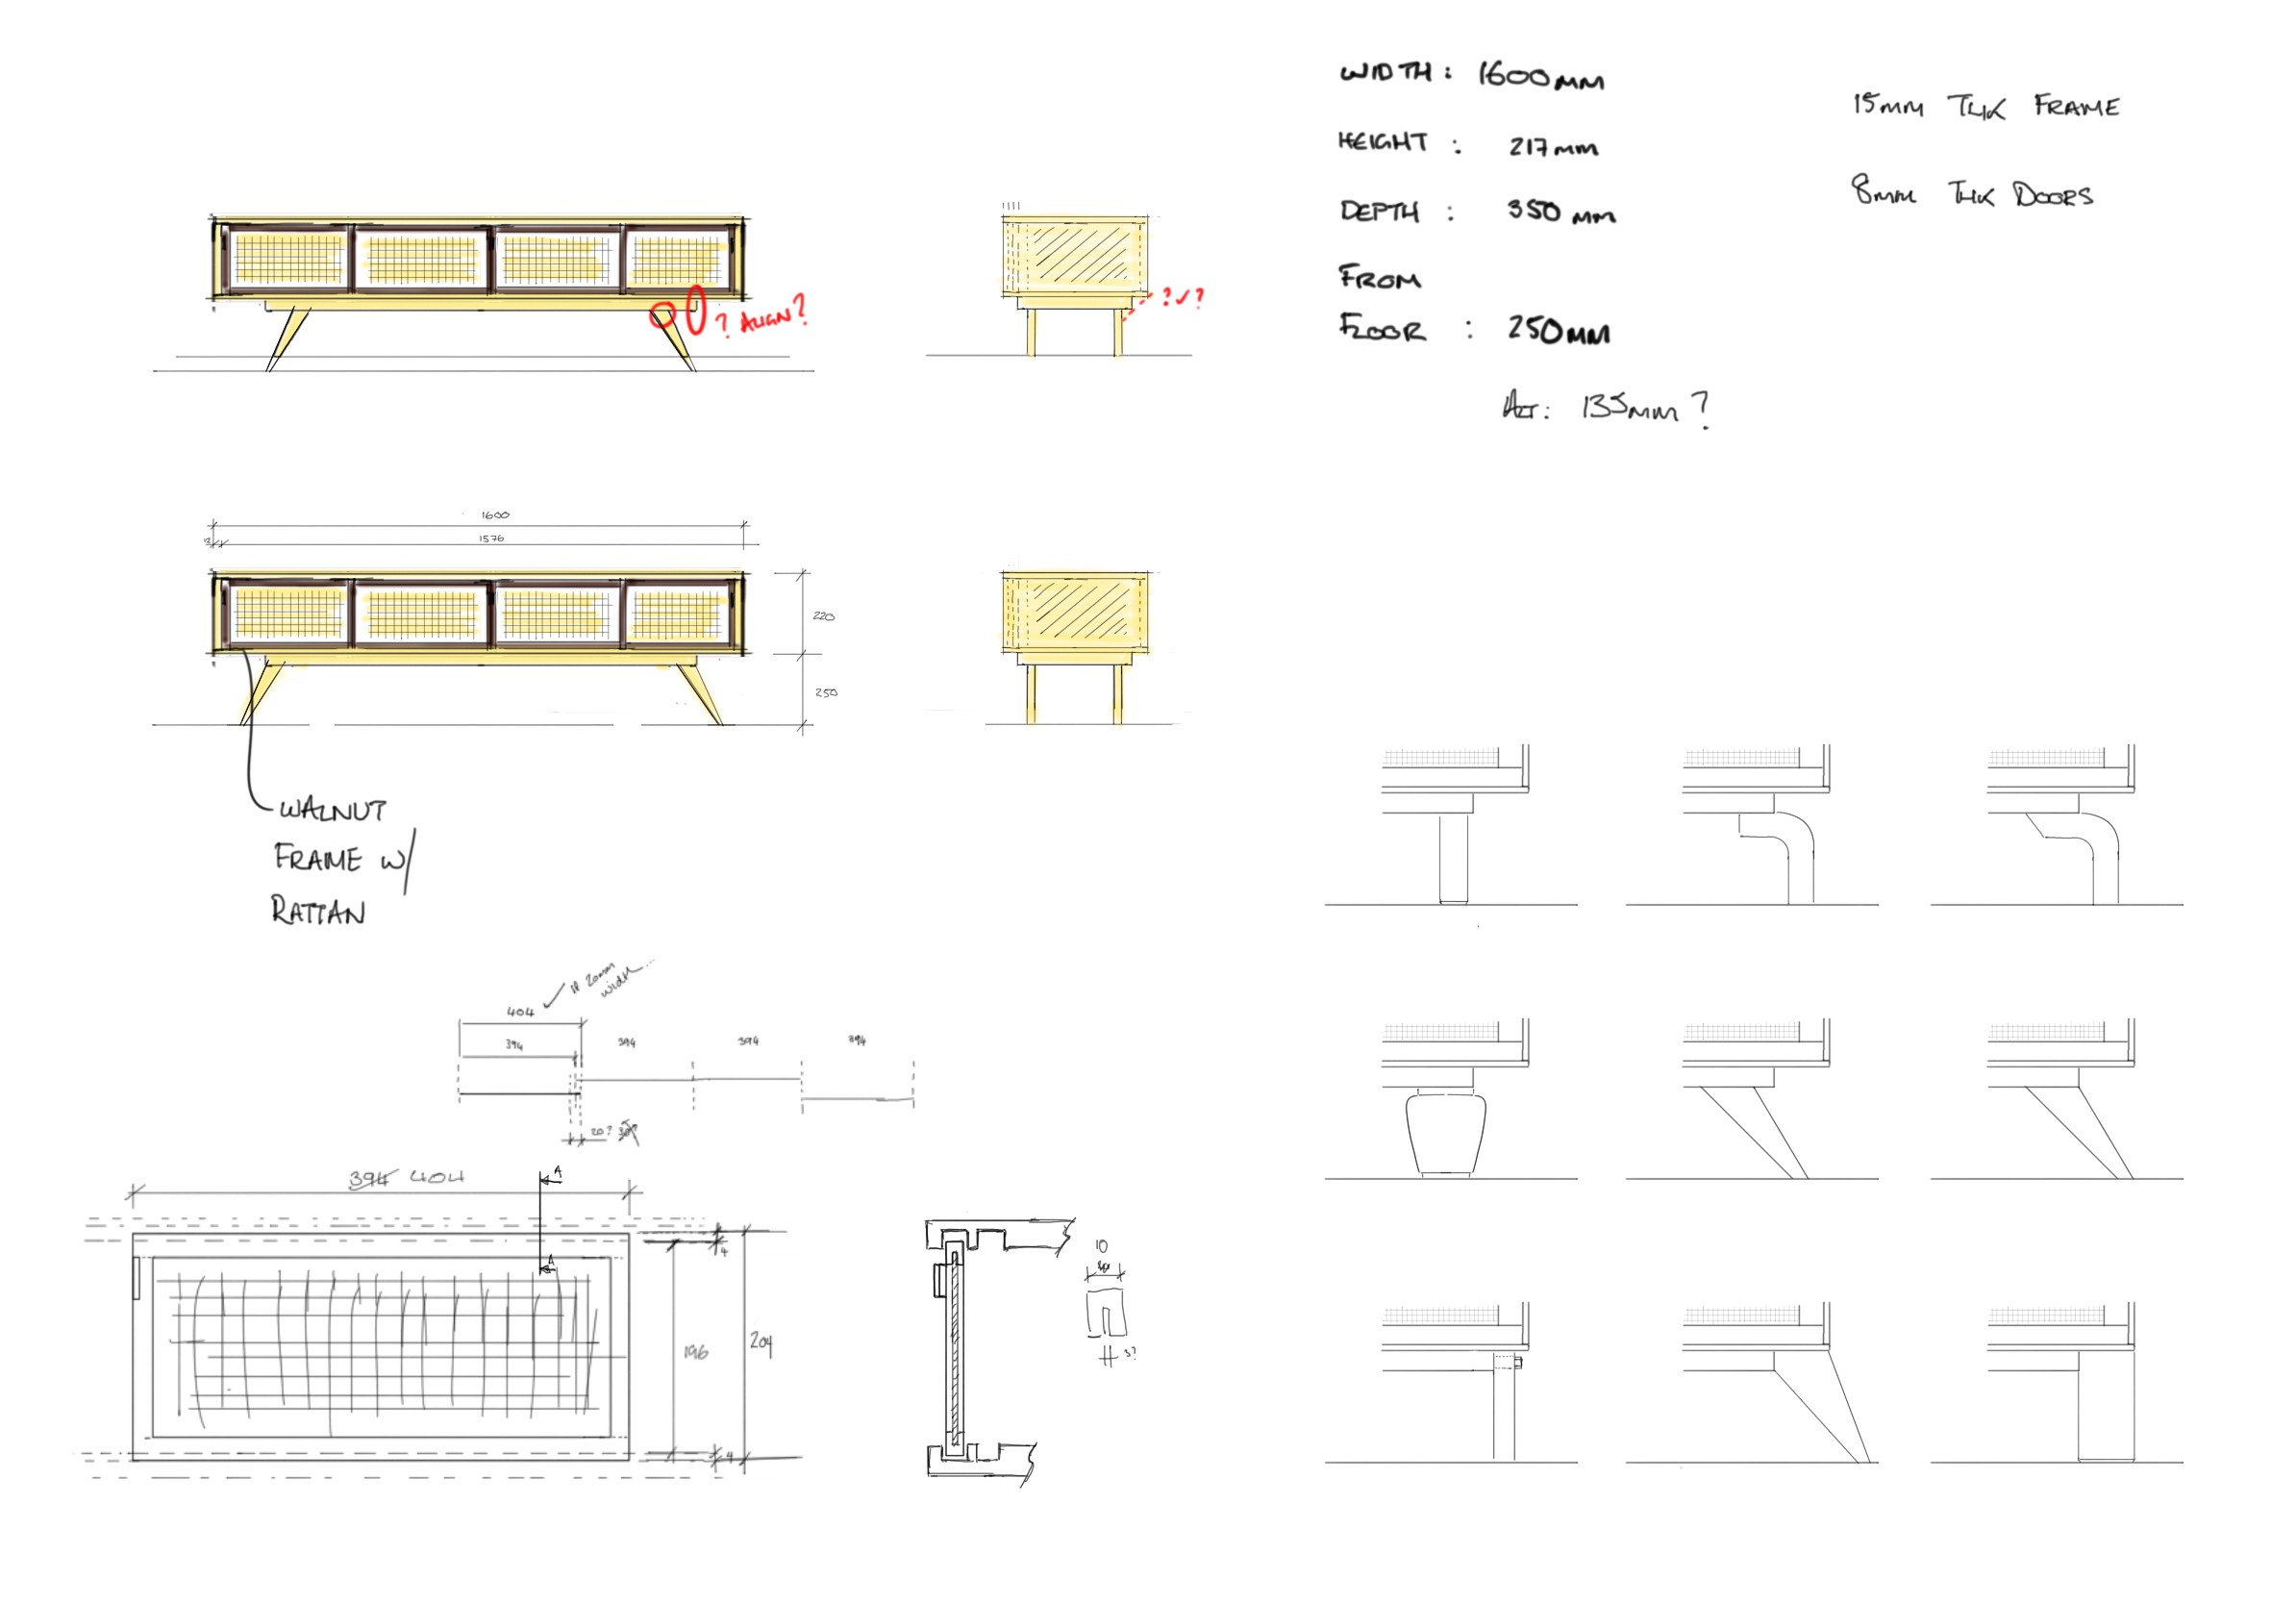
FINDING THE RIGHT MATERIAL
Once the design was in place, I sourced the wood. No shortcuts here — I hunted for timber with real character, grain that tells a story, and strength that can handle years of being admired and leaned on during parties.

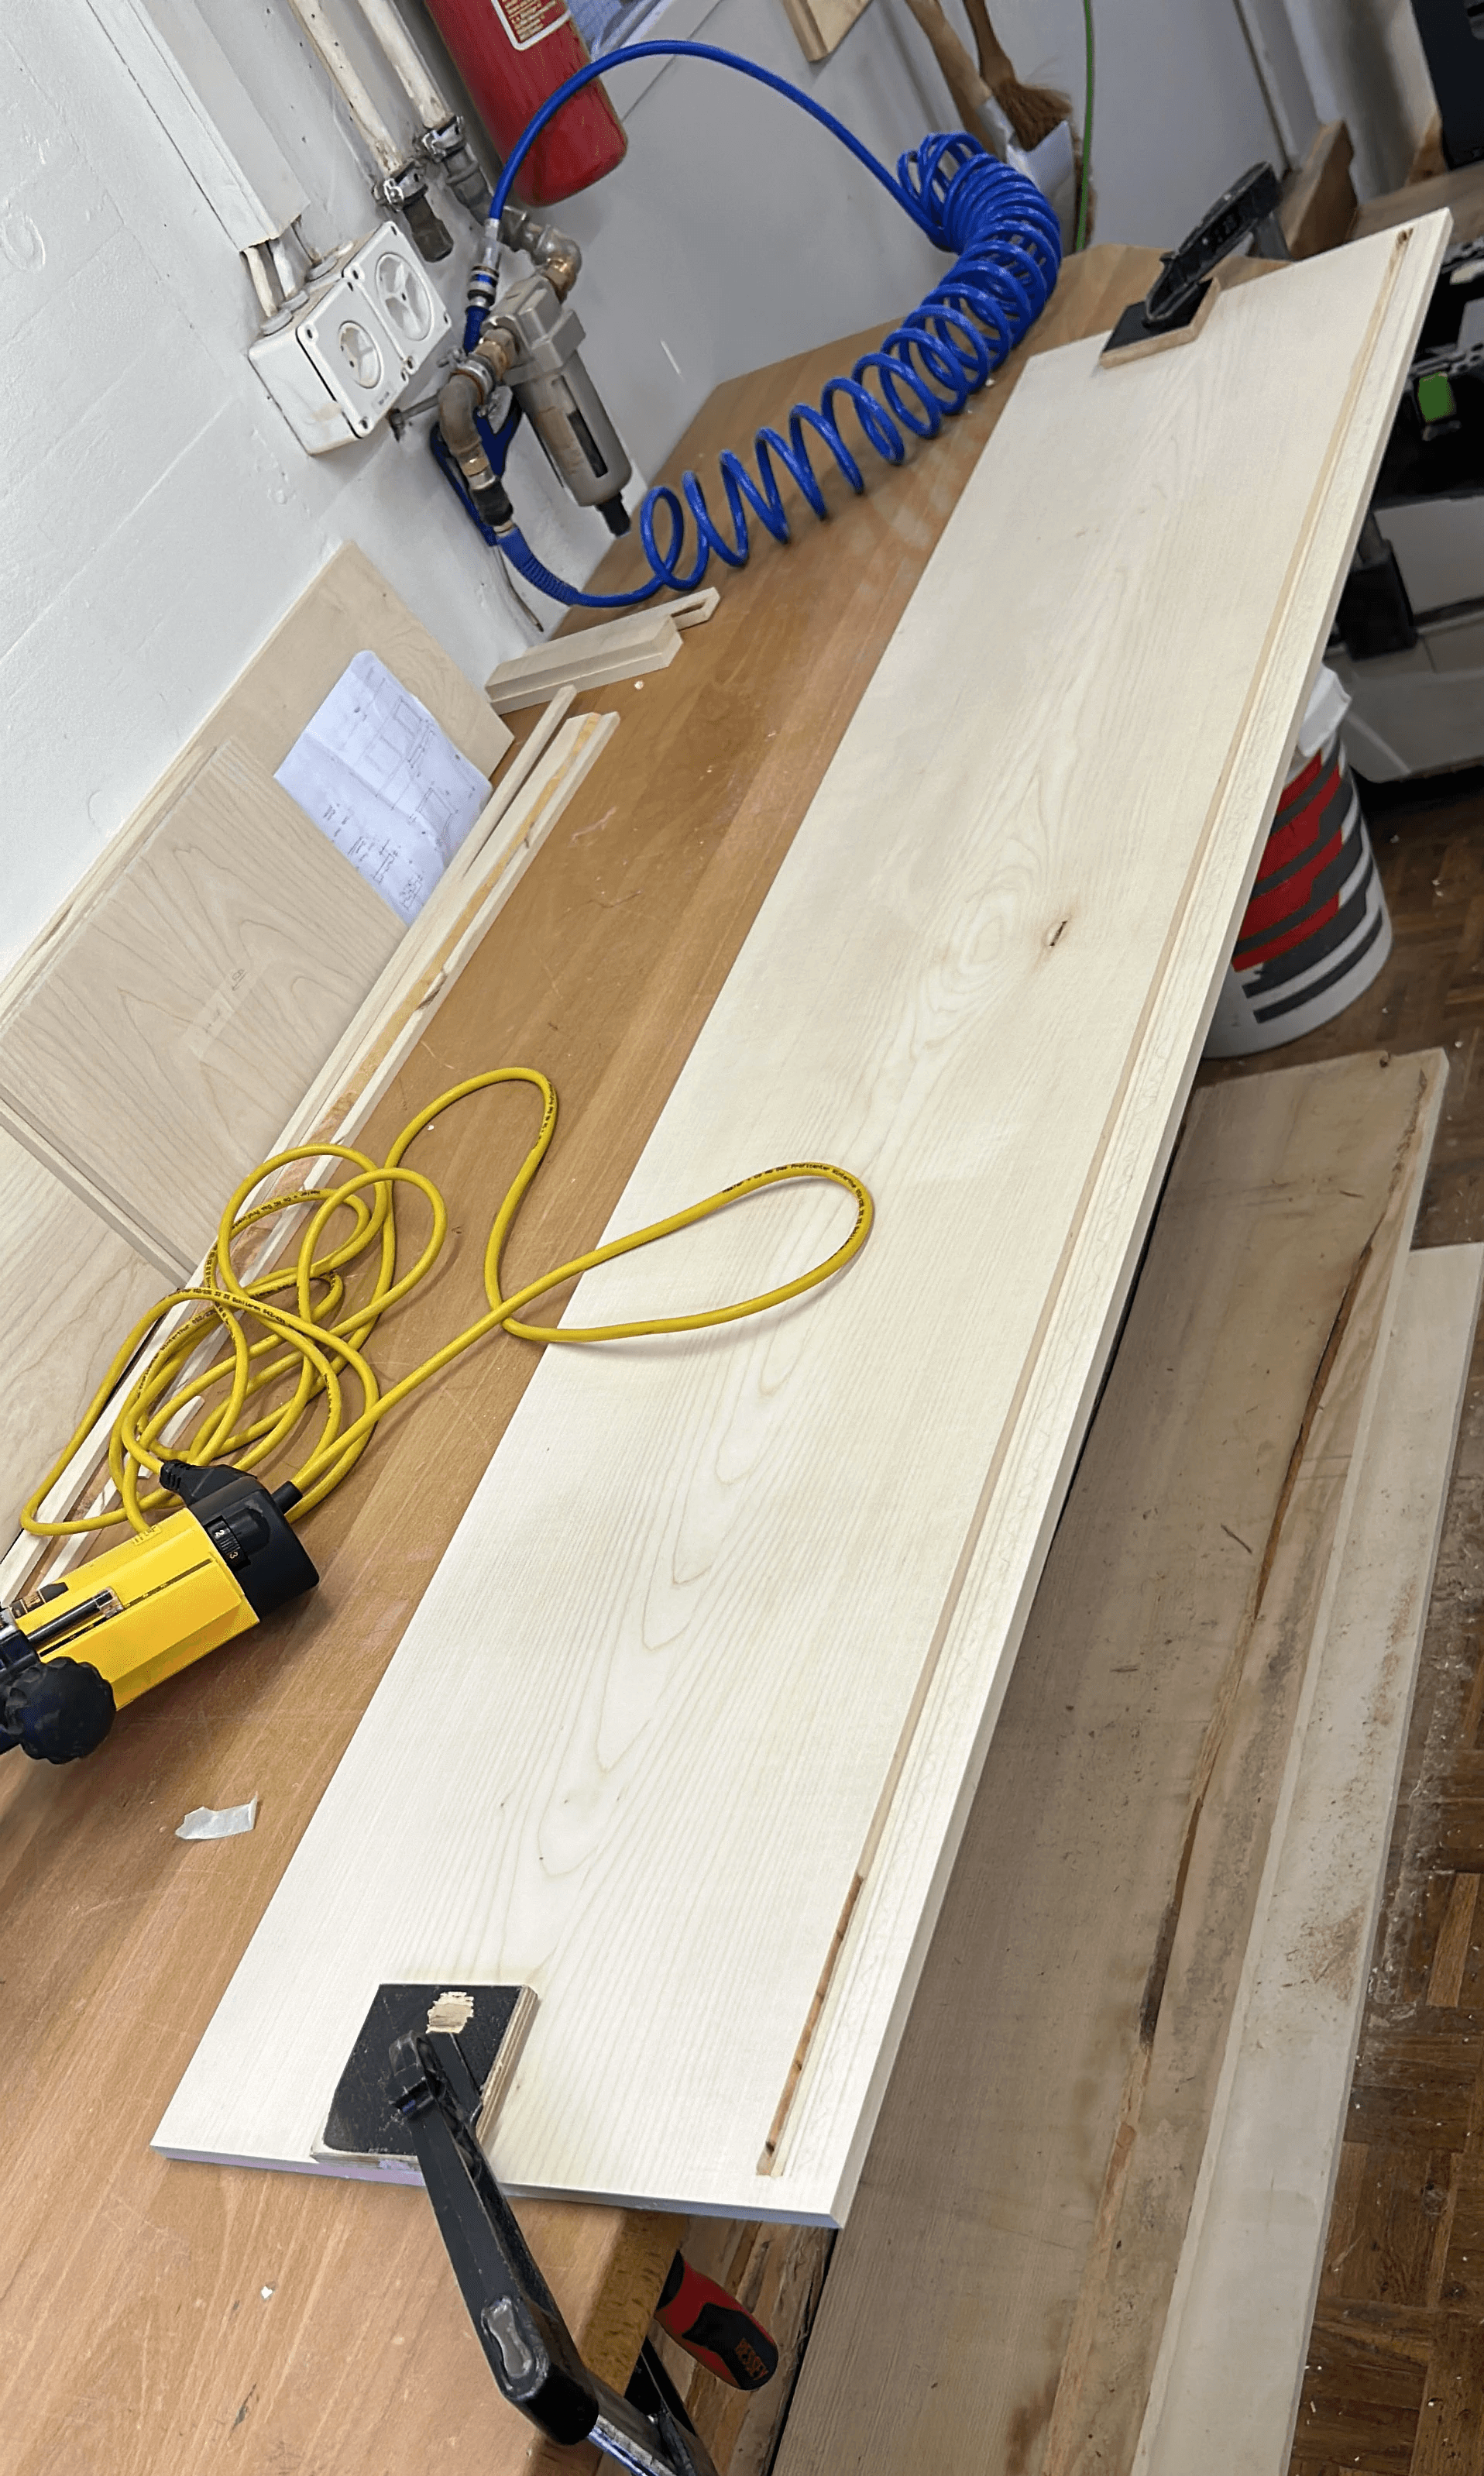
PANEL PREPARATION
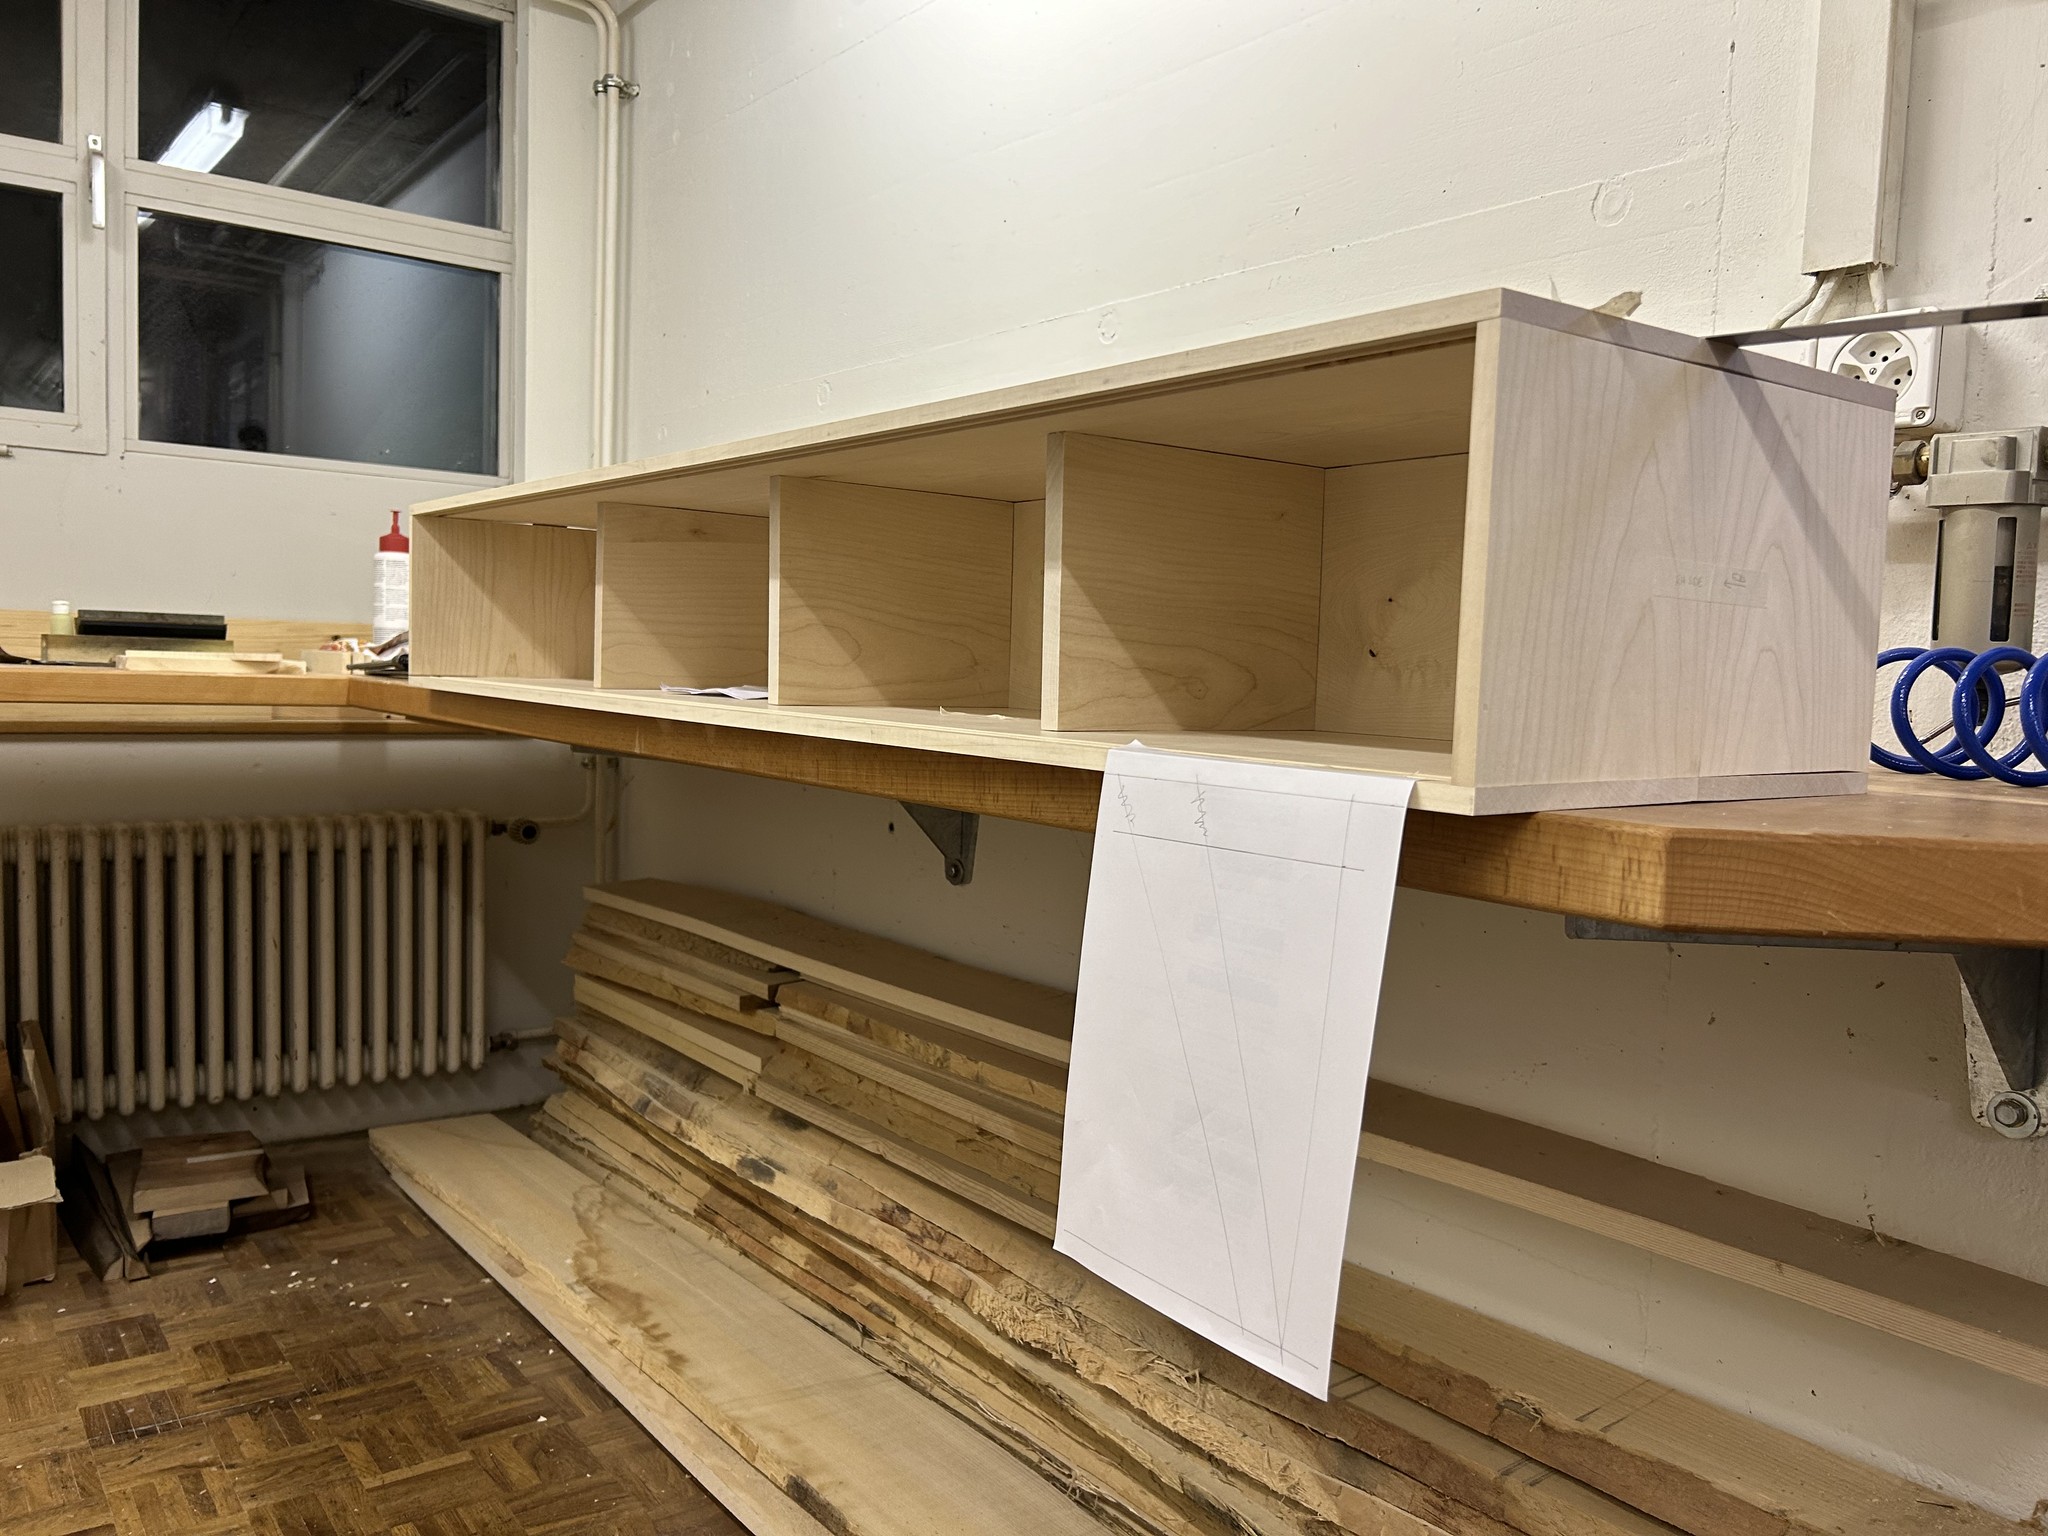
Then the real work began: cutting and crafting the panels, base, legs, and doors. Each part was shaped with precision (and, yes, a little trial and error).

GLUE UP
Once the components were ready, it was time for the carcass glue-up — arguably the most stressful part of the build. It’s the moment when everything has to come together just right. You've got clamps in every direction, glue drying faster than you’d like, and the creeping suspicion you measured one panel upside-down. It really is a dance between panic and precision. Once the last clamp went on and everything was square, I could finally relax.
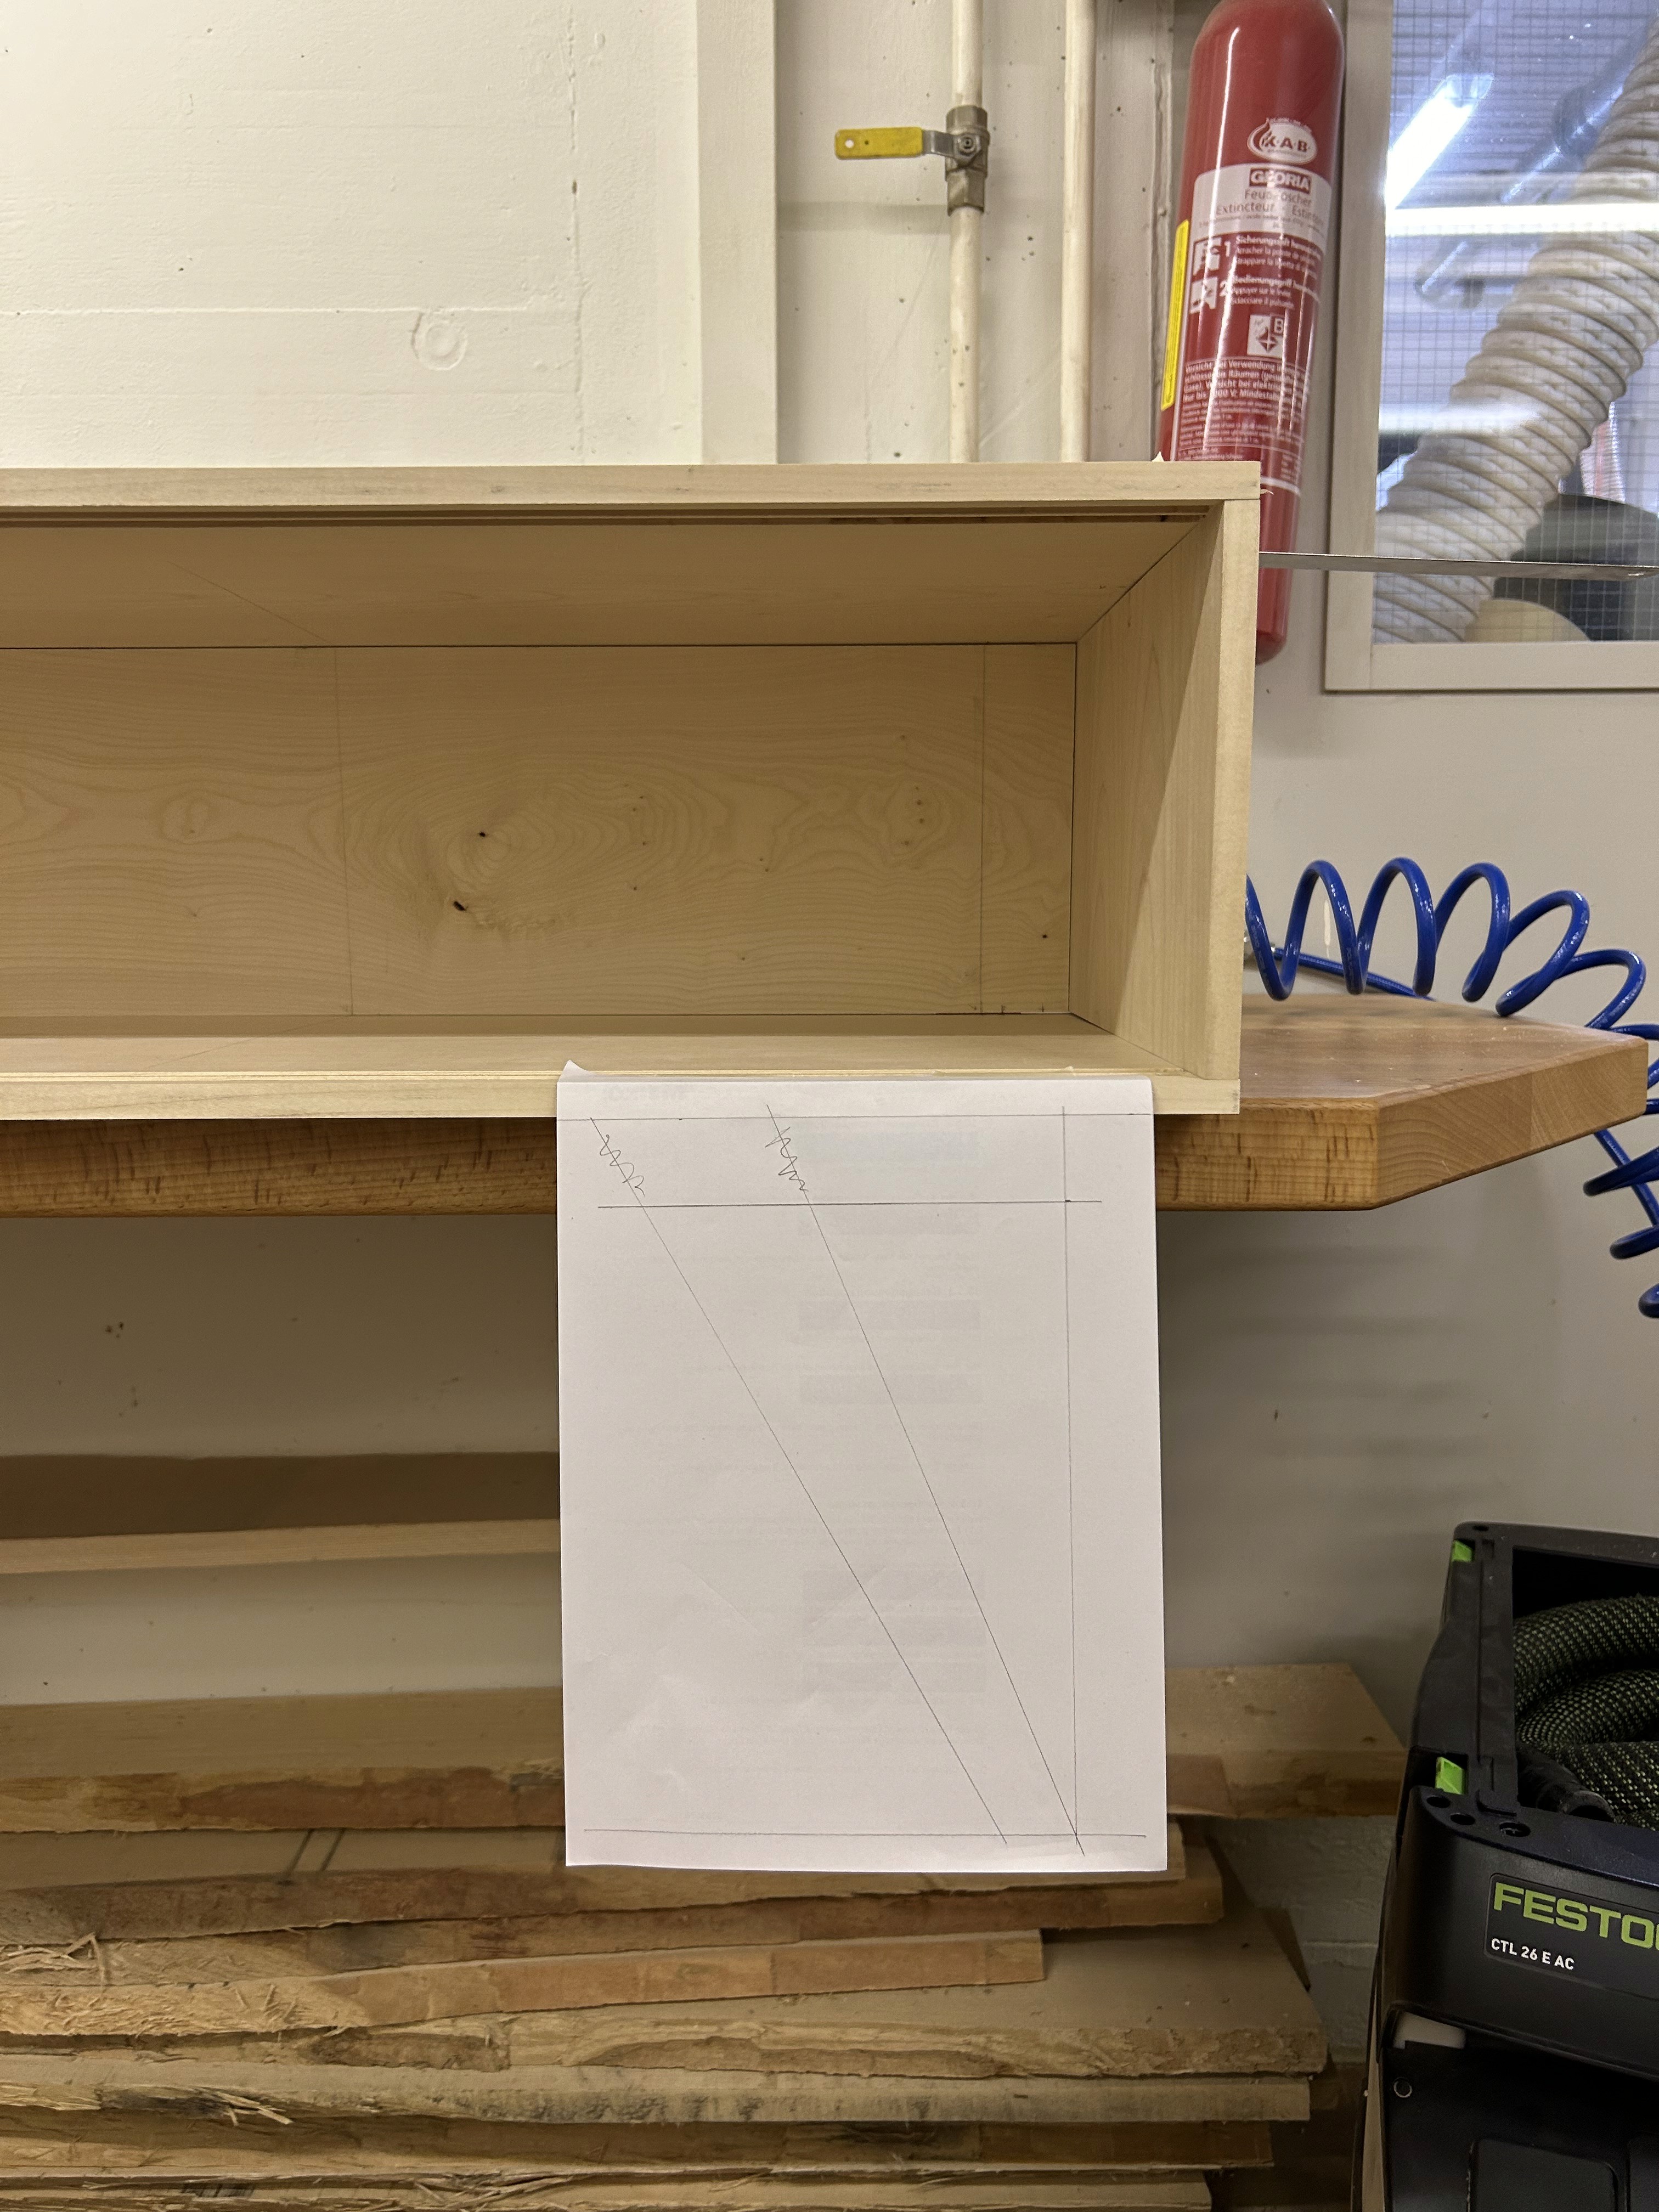
THE LEGS
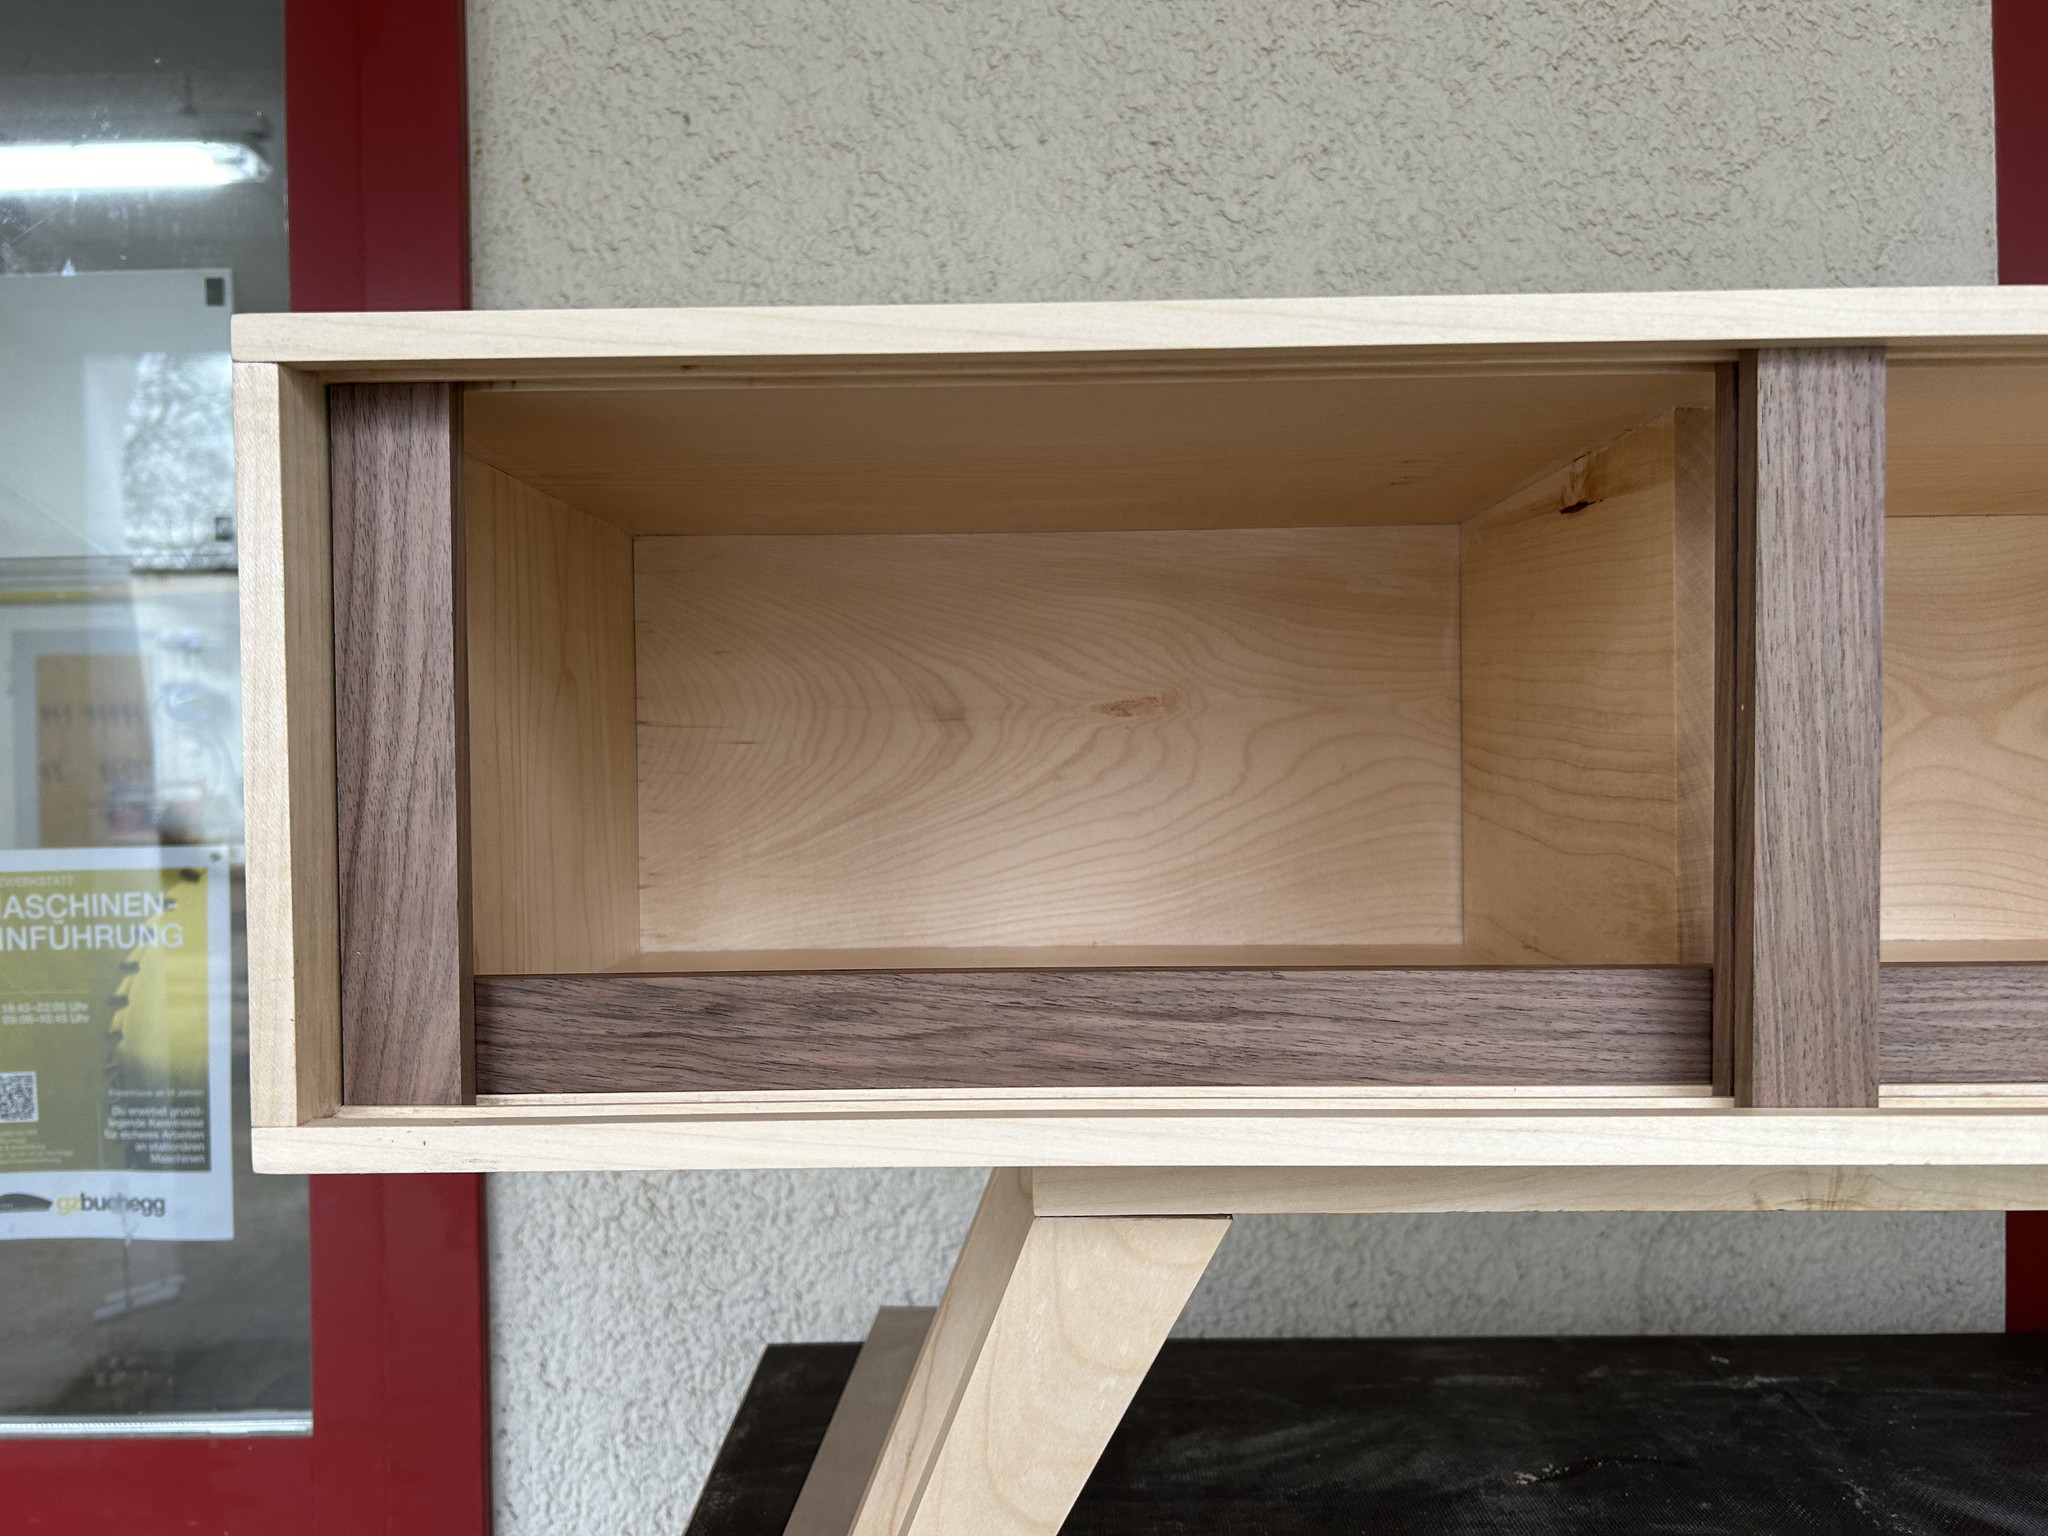
The part where I could experiment the most. By using paper templates, I was able to refine and tune the leg geometry and positioning.

THE DOORS
A simple frame construction, we can start to see the contrast in wood type that really starts to give the Sideboard its identity. At this point, I started to get that feeling of realisation, this might just work!
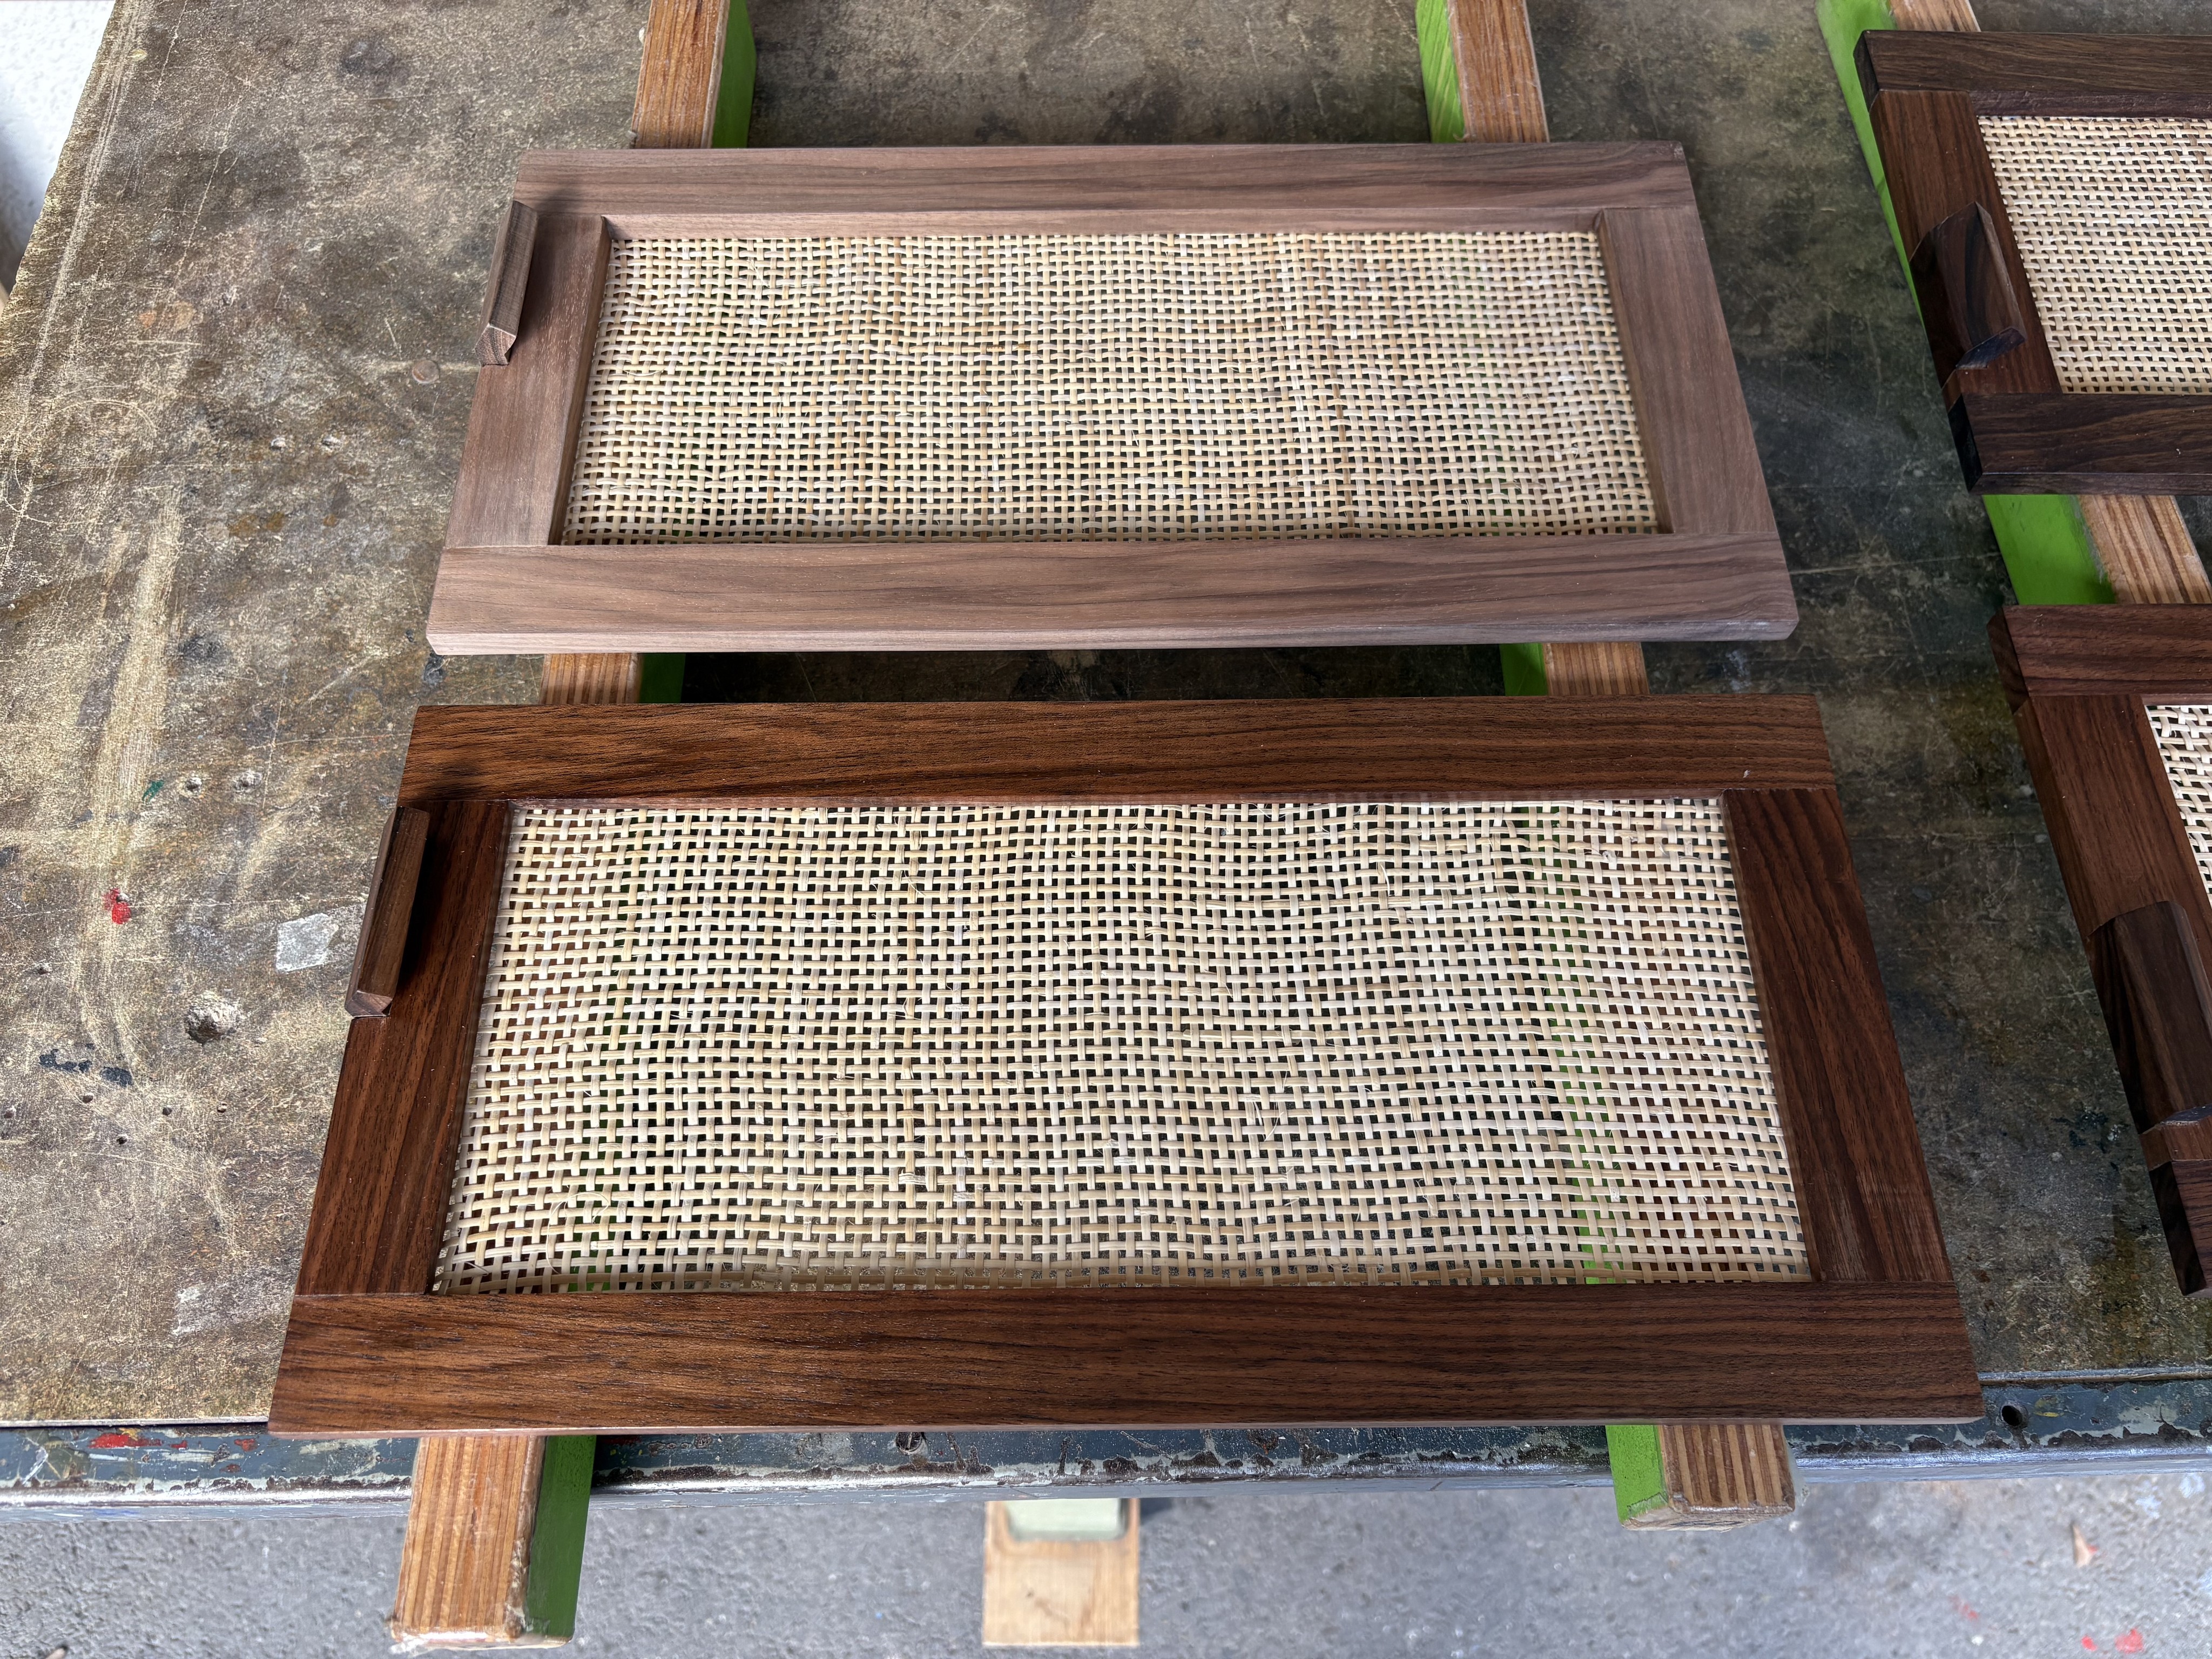
The finishing process really brings out the grain and colours, it always amazes me how much more luxurious the wood looks afterwards.
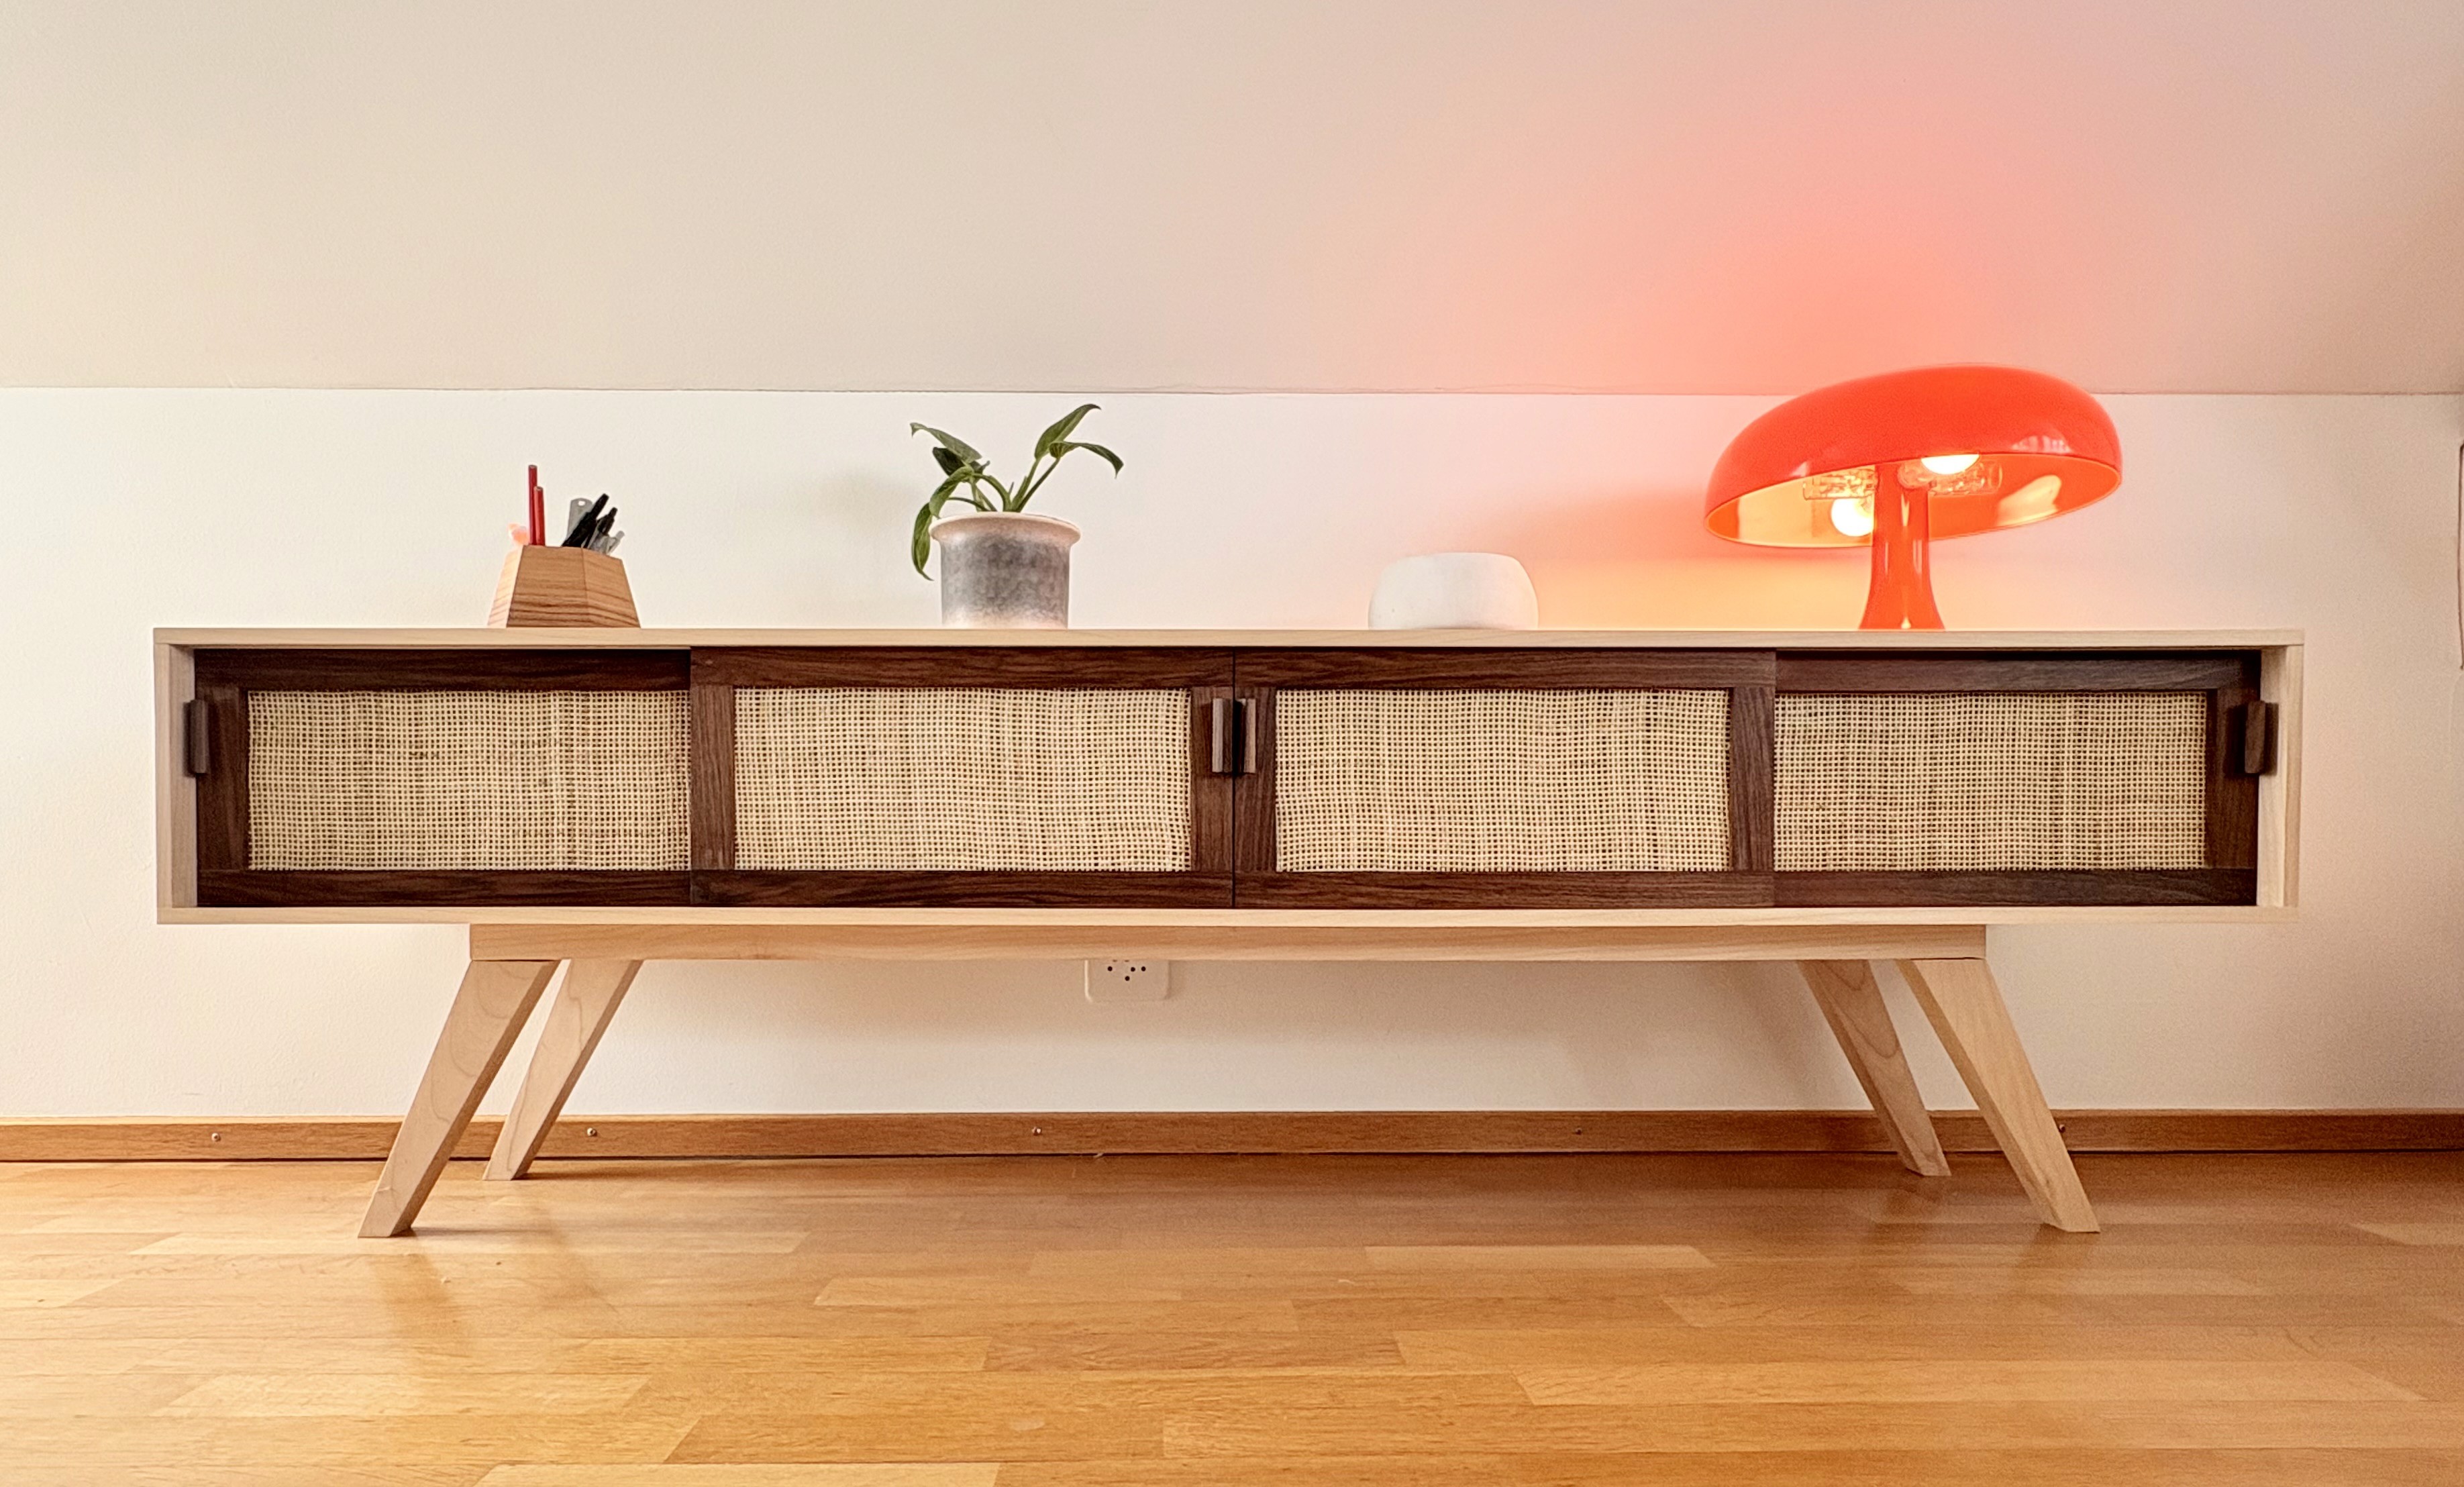
FINAL ASSEMBLY
Where it all comes together (with lots more sanding). The base is attached and the doors and installed and, after a test slide to make sure it all works smoothly, those planks of wood you saw at the start, they have now become The Sideboard.